

Post #1
|
Friday, 04-Jan 2013 @ 10:03pm
Edited by beetwenty
Saturday, 05-Jan 2013 @ 8:56pm
Saturday, 05-Jan 2013 @ 8:56pm
I have decided to do a door card write up.
Ā
This is not the only way to do it, just what I have done.
Ā
Ā
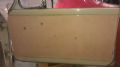
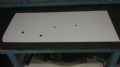
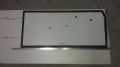
Firstly cut out the shape for your door card and test fit it into your door.
Make sure every thing lines up correctly, this is the easiest time to adjust any sizes that you may need to change.
I am making this the same as the passenger side cards that I have just made, If I make the fronts again I will do a larger hole for the winder (50mm) to allow the foam and vinyl to press further back once the winder is installed as mine are pressing tighter than I think is optimal.
Ā
*EDIT* As it turns out, the winders on a 1000 require there to be almost nothing behind them, so foam or board behind the winder is probably not the best way of doing these if staying with the original 1000 winder handles.
The original cards are just vinyl with a super thin plastic ring glued to the rear of the vinyl and a plastic ring placed between the winder and the front face of the vinyl.
I have bought some winders from another unknown datsun model with more clearance (Hopefully).
I'll add pics of them here once they arive in the post if they fit and add the clearance I need.
Ā
Ā
Ā
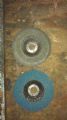
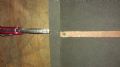
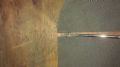
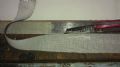
If you need to trim 1mm from the height of your door card, a worn flap disc works well as it won't cut too fast.
You should also allow room for your vinyl when checking your fit.
(Don't use a new flap disc if you are not steady with a grinder as you will loose alot of wood fast).
Below is a pic of one worn flap disc and one new one.
Ā
If you are working at home like me then your work area that the door cards were cut in is also the work area that you will be gluing in.
So before moving on sweep up and clean your working surfaces, as the saw dust from the masonite will weaken the contact adhesives bonding strength.
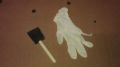
You will also need gloves and a brush.
I went with a few packs of foam brushes in asorted sizes, they are cheap and work very well.
Ā
Ā
Ā
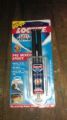
I work with the contact adhesive between my two parts that are to be glued together so that I don't get drips on anything that I don't want them on.
Ā

Ā
Ā
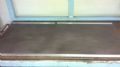
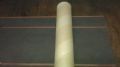
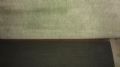
I weigh down my foam sheet (Closed-Cell-Foam) so that it dosn't curl over and stick to it's self.
Ā
Ā
Once the contact adhesive is ready, lightly press it down to the door card untill it is all sitting flat.
Work from one end to the other.
Ā
Ā
Turn the card over and trim any excess foam.
Ā
Ā
If you have already made a door card on the same side of the car, you can line up your weld lines from the other card.
I also removed 10mm from the top and bottom of my cards to allow them to fit into the mounting channels in my doors.
(Otherwise measure and cut out as required, I used 8mm gaps for my grooves)
Ā
Ā
When removing your foam some pieces can get left behind, a flat screwdriver works well to remove the excess.
Ā
Ā
This is a good time to check that both cards line up. (Front and Rear)
Ā
Ā
Once you are happy with the foam you can press it all down firmly with a roller of any kind.
(Waiting untill now will make cleaning out your grooves much easier)
Ā
Ā
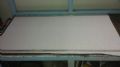
Then it is time to glue the vinyl and front face of your door card.
(Weigh the ends down again)
Ā
Ā
Once the glue is ready stick the vinyl to the door card.
(Working from one end to the other like before).
Ā
Ā
Ā
Trim the vinyl around your card leaving aprox 25mm extra.
Ā
Ā
Glue the back of your door card with a skinny brush.
Ā
Ā
Stick the vinyl down.
(These pics show some vinyl cut and some ready to cut to show how I worked around corners)
Ā
Ā
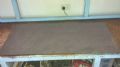
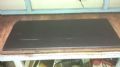
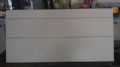
Once everything is stuck down the front should look something like this.
Ā
Ā
Ā
Then it is time to press in the weld lines, so a quick run down on my mould and how it works.
Ā
Ā
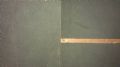
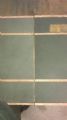
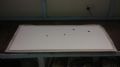
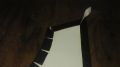
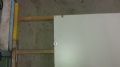
First I cut two 1mm deep grooves into a sheet of melamine with a circular saw.
Ā
Ā
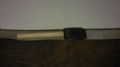
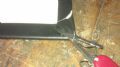
Then I glued down two 1/4 inch theaded rods with araldite.
(I found some with a neat mixing nozzle which made applying the glue into the groove very easy)
Ā
Ā
Then I weighed the rod down while the glue set.

Ā
Ā
My mould all finished with some aluminium strips at 90 deg to use as a reference for what is straight and what is the bottom edge of the door card.
Ā
Ā
Ā
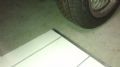
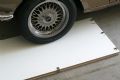
So it is now time to press the door card.
The idea is to have the wheel of my datsun pass directly over the threaded rod to leave an impression in the door card weld lines.
Ā
Ā
Ā
Then place the door card onto the mould.
Ā
Ā
Ā
And the top piece over the door card and screw the corners down to keep it all still.
(Don't put any screws through the door card).

Ā
Ā
To stop my mould from moving while I push my datsun over it I packed it against my work bench with some scraps of wood.
Ā
Ā
Run the wheel directly over the threaded rod, three times for each rod.
Ā
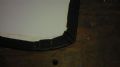
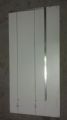
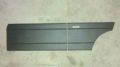
Then take the card out of the mould and it should look like this.
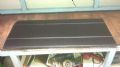

Ā
This is not the only way to do it, just what I have done.
Ā
Ā
Firstly cut out the shape for your door card and test fit it into your door.
Make sure every thing lines up correctly, this is the easiest time to adjust any sizes that you may need to change.
I am making this the same as the passenger side cards that I have just made, If I make the fronts again I will do a larger hole for the winder (50mm) to allow the foam and vinyl to press further back once the winder is installed as mine are pressing tighter than I think is optimal.
Ā
*EDIT* As it turns out, the winders on a 1000 require there to be almost nothing behind them, so foam or board behind the winder is probably not the best way of doing these if staying with the original 1000 winder handles.
The original cards are just vinyl with a super thin plastic ring glued to the rear of the vinyl and a plastic ring placed between the winder and the front face of the vinyl.
I have bought some winders from another unknown datsun model with more clearance (Hopefully).
I'll add pics of them here once they arive in the post if they fit and add the clearance I need.
Ā

Ā
Ā
If you need to trim 1mm from the height of your door card, a worn flap disc works well as it won't cut too fast.
You should also allow room for your vinyl when checking your fit.
(Don't use a new flap disc if you are not steady with a grinder as you will loose alot of wood fast).
Below is a pic of one worn flap disc and one new one.

Ā
If you are working at home like me then your work area that the door cards were cut in is also the work area that you will be gluing in.
So before moving on sweep up and clean your working surfaces, as the saw dust from the masonite will weaken the contact adhesives bonding strength.
You will also need gloves and a brush.
I went with a few packs of foam brushes in asorted sizes, they are cheap and work very well.
Ā

Ā
Ā
I work with the contact adhesive between my two parts that are to be glued together so that I don't get drips on anything that I don't want them on.
Ā

Ā
Ā
I weigh down my foam sheet (Closed-Cell-Foam) so that it dosn't curl over and stick to it's self.

Ā
Ā
Once the contact adhesive is ready, lightly press it down to the door card untill it is all sitting flat.
Work from one end to the other.

Ā
Ā
Turn the card over and trim any excess foam.

Ā
Ā
If you have already made a door card on the same side of the car, you can line up your weld lines from the other card.
I also removed 10mm from the top and bottom of my cards to allow them to fit into the mounting channels in my doors.
(Otherwise measure and cut out as required, I used 8mm gaps for my grooves)


Ā
Ā
When removing your foam some pieces can get left behind, a flat screwdriver works well to remove the excess.

Ā
Ā
This is a good time to check that both cards line up. (Front and Rear)

Ā
Ā
Once you are happy with the foam you can press it all down firmly with a roller of any kind.
(Waiting untill now will make cleaning out your grooves much easier)

Ā
Ā
Then it is time to glue the vinyl and front face of your door card.
(Weigh the ends down again)

Ā
Ā
Once the glue is ready stick the vinyl to the door card.
(Working from one end to the other like before).

Ā
Ā
Ā
Trim the vinyl around your card leaving aprox 25mm extra.


Ā
Ā
Glue the back of your door card with a skinny brush.

Ā
Ā
Stick the vinyl down.
(These pics show some vinyl cut and some ready to cut to show how I worked around corners)


Ā
Ā
Once everything is stuck down the front should look something like this.

Ā
Ā
Ā
Then it is time to press in the weld lines, so a quick run down on my mould and how it works.
Ā
Ā
First I cut two 1mm deep grooves into a sheet of melamine with a circular saw.

Ā
Ā
Then I glued down two 1/4 inch theaded rods with araldite.
(I found some with a neat mixing nozzle which made applying the glue into the groove very easy)

Ā
Ā
Then I weighed the rod down while the glue set.

Ā
Ā
My mould all finished with some aluminium strips at 90 deg to use as a reference for what is straight and what is the bottom edge of the door card.

Ā
Ā
Ā
So it is now time to press the door card.
The idea is to have the wheel of my datsun pass directly over the threaded rod to leave an impression in the door card weld lines.

Ā
Ā
Ā
Then place the door card onto the mould.

Ā
Ā
Ā
And the top piece over the door card and screw the corners down to keep it all still.
(Don't put any screws through the door card).

Ā
Ā
To stop my mould from moving while I push my datsun over it I packed it against my work bench with some scraps of wood.

Ā
Ā
Run the wheel directly over the threaded rod, three times for each rod.

Ā
Then take the card out of the mould and it should look like this.


 1967 Datsun B10 2 Door.
