Post #100
|
Monday, 08-Apr 2013 @ 6:45pm
Edited by
beetwenty
Monday, 08-Apr 2013 @ 6:47pm
Well I have wired up my speakers, screwed the speaker mounts down in each corner of the wood with tiny nuts and bolts, using big washers to ovellap the original metal of the car, but not add any holes to the car.
I glued down some closed cell foam on the under side of my parcel shelf.
Ā
The 6x9's distort before anything in the car vibrates, So im pleased with my results there.

Ā
Ā
On to bigger news... I have made up a new dash pad over the weekend and have just finished it off after work today.
Ā
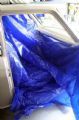
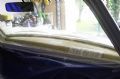
I covered my dash with masking tape, made a trough infront of my dash with even more masking tape and a length of timber, then placed drop sheets over everything else.
I drew lines with a nikko pen to define the areas i needed to fibreglass.
Then I gave all the masking tape a coat of vaseline to act as my release agent.
Ā
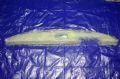
I brushed everything down with a layer of resin and got into laying fibreglass (2 layers, waited for it to firm up a little and then added a third layer).
Ā
I was very careful not to build up the edges too much and create a part bigger than the hole it needs to come out of.
Luckily it came out very easyily, although it was a little tight in the corners because of it's width.
Ā
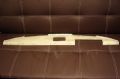
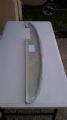
After a rough trim it is already looking like a dash.
Ā
I sanded down my high points and added a thin wipe of pink body filler into the lows.
Knocked the highs down again, added a few coats of spray putty and gave it all a final sand & one last fine trim around some edges.
Ā
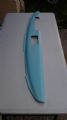
Then spray glued everything and wraped it in black vinyl.
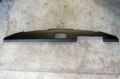
Ā
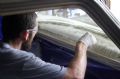
Here it is in place.
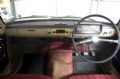
Ā
I am very pleased with how this finished up, it was my first attempt at Fibreglass and also trimming something in vinyl that has 3D shape to it.
Ā
Ash.


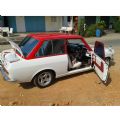
 1967 Datsun B10 2 Door.