Post #281
|
Saturday, 16-Mar 2019 @ 7:49pm
Edited by beetwenty
Saturday, 16-Mar 2019 @ 7:52pm
Saturday, 16-Mar 2019 @ 7:52pm
I guess it will be a case of wire brush later as it is all packed up now.
Ā
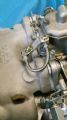
Had a quick play in the shed this afternoon.
I used a bicycle v brake noodle (flexible type) to allow a 180deg turn of my choke cable. (AlsoĀ bicycle cable).
Ā
I used the mounting part from an old carb and made up a bracket from 2mm steel.
Ā
I also needed to file the aluminium end of the brake cable noodle down from 6mm OD to 5mm OD to fit into the webers choke cable location.
Ā
This should allow a more direct cable routing path.
Ā
Had a quick play in the shed this afternoon.
I used a bicycle v brake noodle (flexible type) to allow a 180deg turn of my choke cable. (AlsoĀ bicycle cable).
Ā
I used the mounting part from an old carb and made up a bracket from 2mm steel.
Ā
I also needed to file the aluminium end of the brake cable noodle down from 6mm OD to 5mm OD to fit into the webers choke cable location.

Ā
This should allow a more direct cable routing path.
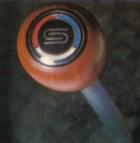
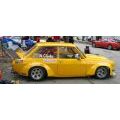
 1967 Datsun B10 2 Door.